 ESP32-开发环境配置
# ESP32-开发环境配置
本文以ESP32-S3N16R8为例,介绍如何使用Arduino IDE 和 PlatformIO IDE编译ESP32。
# Arduino IDE
官网: Software | Arduino (opens new window)
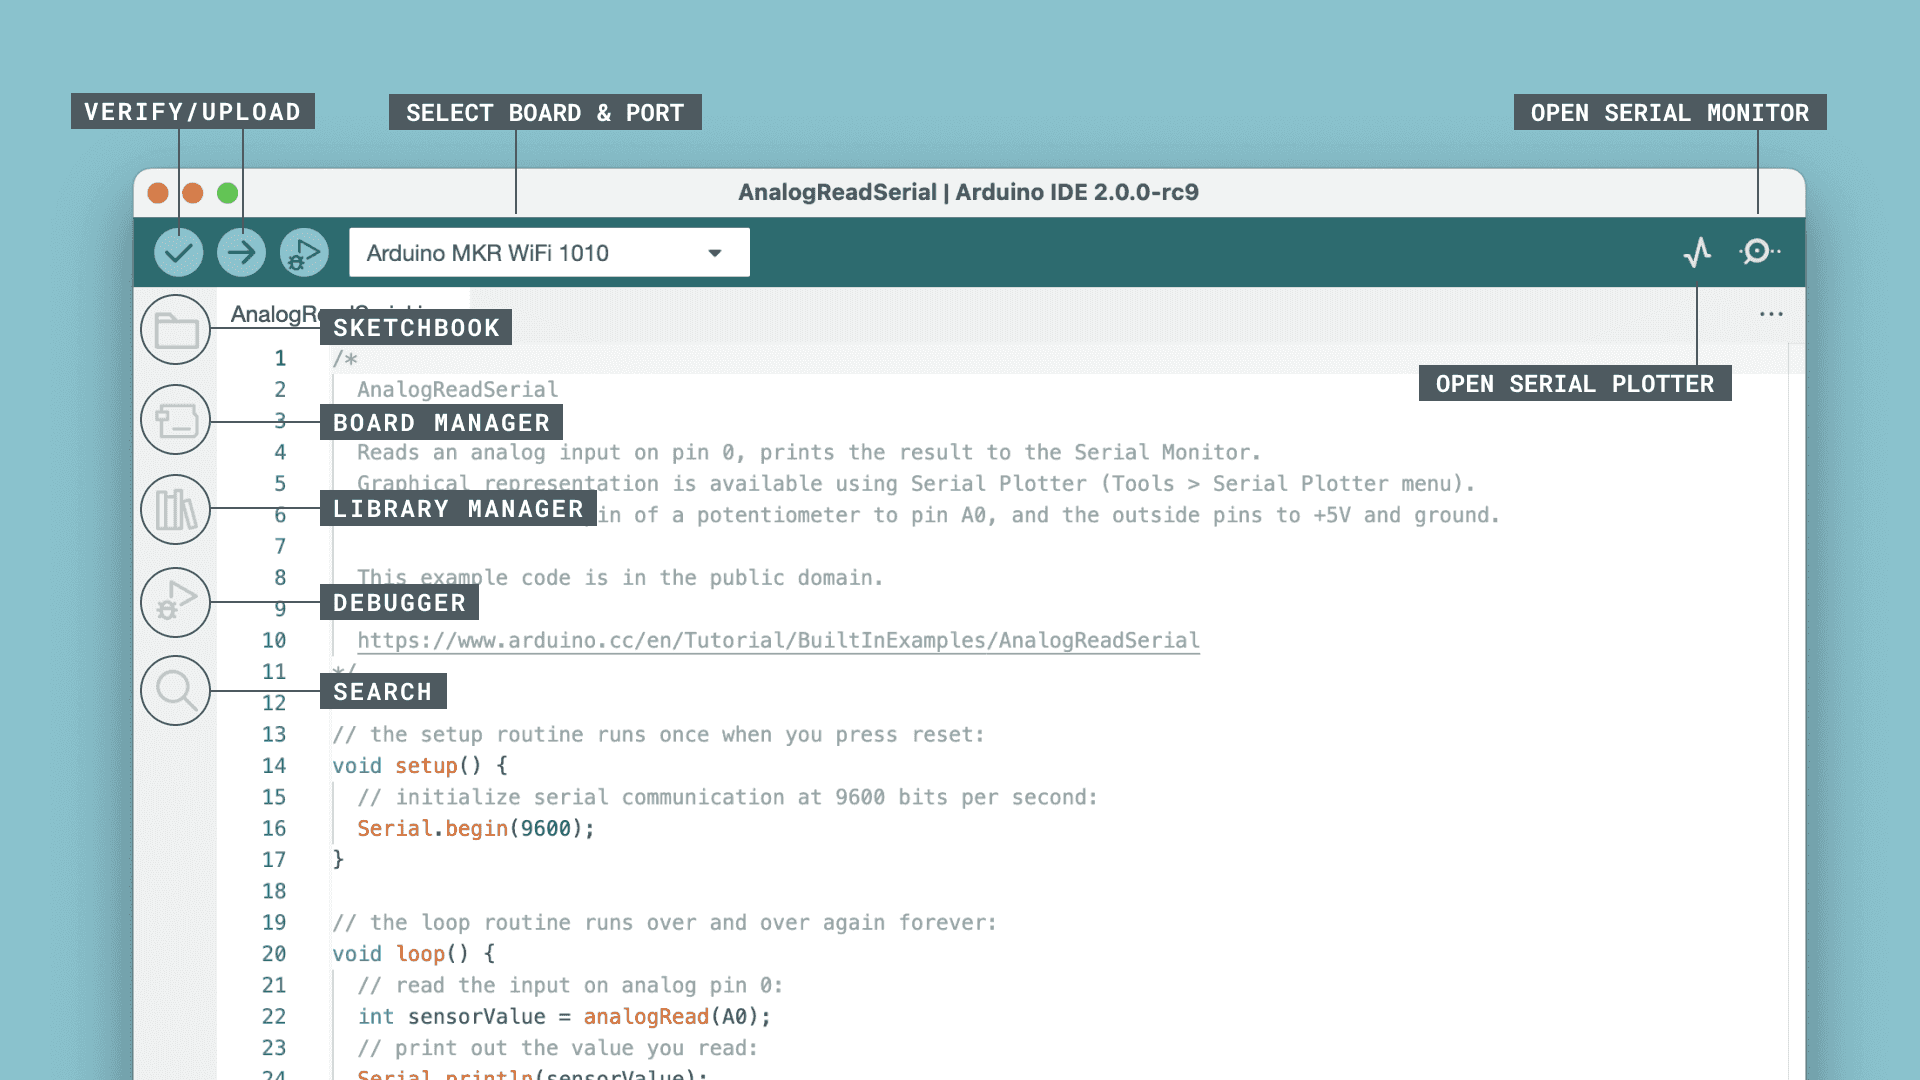
- Verify / Upload - 编译代码并将其上传到您的 Arduino 板。
- Select Board & Port - 检测到的 Arduino 板及其端口号会自动显示在此处。
- Sketchbook - 在此处您将找到本地存储在本计算机上的所有项目文件。此外,您还可以与 Arduino Cloud 同步,以及从在线环境获取您的项目文件。
- Boards Manager - 浏览可安装的 Arduino 和第三方软件包。例如,使用 MKR WiFi 1010 板需要安装 Arduino SAMD Boards 软件包。
- Library Manager - 浏览由 Arduino 及其社区开发的数千个 Arduino 库。
- Debugger - 实时测试和调试程序。
- Search - 在代码中搜索关键词。
- Open Serial Monitor - 以新标签页的形式在控制台中打开串口监视器工具。
# PlatformIO IDE for VSCode
官网:Your Gateway to Embedded Software Development Excellence · PlatformIO (opens new window)
在vscode中使用platformio:插件市场里搜索PlatformIO IDE。
# 快速开始
官方文档:PlatformIO IDE for VSCode — PlatformIO latest documentation (opens new window)
本教程向您介绍 PlatformIO IDE 工作流的基础知识,并向您展示一个简单的 “Blink” 示例的创建过程。完成后,您将对如何在 IDE 中处理项目有一个大致的了解。
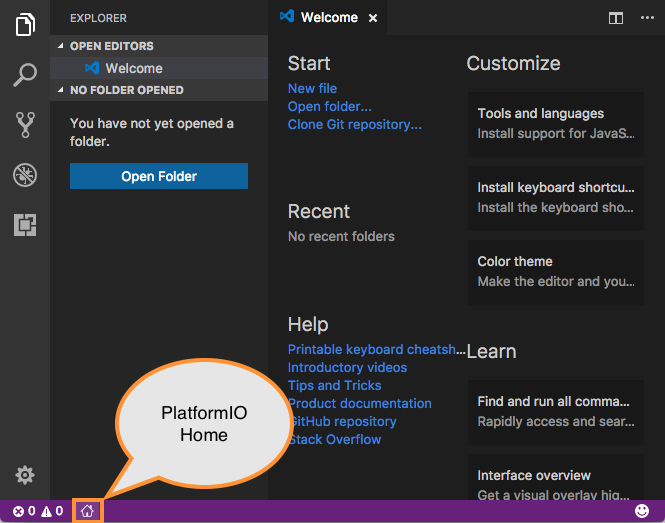
在PlatformIO底部工具栏中点击 “PlatformIO Home” 按钮,如图:
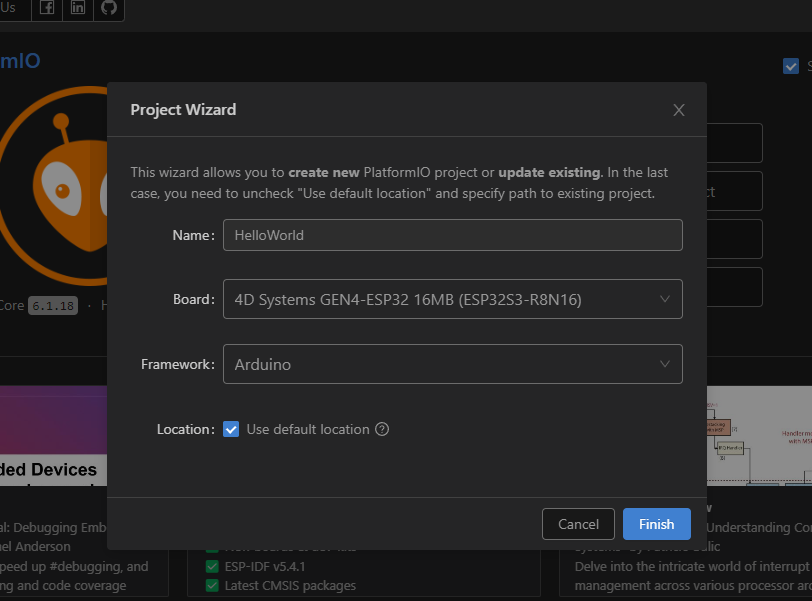
点击“New Project”,选择一个板子并创建项目
在
src目录下打开main.cpp并替换成下面内容:/** * Blink * * Turns on an LED on for one second, * then off for one second, repeatedly. */ #include "Arduino.h" // Set LED_BUILTIN if it is not defined by Arduino framework #define LED_BUILTIN 13 void setup() { // initialize LED digital pin as an output. pinMode(LED_BUILTIN, OUTPUT); } void loop() { // turn the LED on (HIGH is the voltage level) digitalWrite(LED_BUILTIN, HIGH); // wait for a second delay(1000); // turn the LED off by making the voltage LOW digitalWrite(LED_BUILTIN, LOW); // wait for a second delay(1000); }1
2
3
4
5
6
7
8
9
10
11
12
13
14
15
16
17
18
19
20
21
22
23
24
25
26
27
28
29
30
31编译项目可以使用快捷键
ctrl+alt+b或者使用PlatformIO底部工具栏的按钮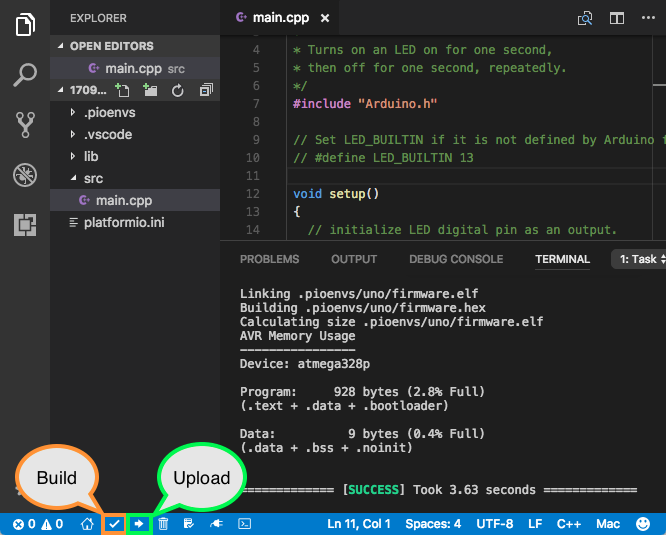
PaltformIO还支持断点调试功能,与vscode正常调试方法一样。
编辑 (opens new window)
上次更新: 2025/06/14, 12:12:59
